Sunday, February 27, 2011

Heritage layouts-M

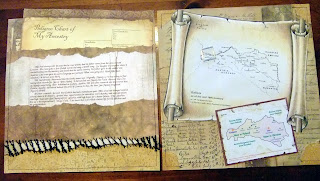
Hi! I thought I would post a few more heritage layouts. These are from my husband's side of the family. This first picture is the opening page of the album.

The second layout is similar to the one I did for my mother's heritage album. The left page contains a brief history of the family's origins, and tucked in the pocket will be an ancestry chart. The second page shows maps of the area of their origin.( Karen Foster makes nice ancestry charts in 12 x 12 form.)


The next layout is of my husband's grandfather's immigration to America. I only had one picture of him , so I looked up the ship he sailed on on the internet and also pictures of steerage passengers from that time and included these on the layouts.


This great trunk paper is called "Grandma's Trunk" and is from Karen Foster. (She has great heritage papers and accents.) I made a pocket with the trunk paper by sewing along the edges. Then I tucked in a picture, a watch and ticket stickers (K& Co, and Karen Foster), journaling, stamped knife image (Stampin Up), old chain and antique buttons. The round letters are old ones from Joann's.

This layout shows my husband's grandfather's first wedding on the first page and a family group page on the second page. (The family group paper is also from Karen Foster.)


John Mastie worked in the Pennsylvania coal mines and later in the iron mines here in the U.P. of Michigan. I had no pictures of him in the mines so I copied pictures from the internet showing coal miners from that time for page one. For the second page I copied pictures of the iron mine he worked in from a centenial book of the area. I included mining accents from pg. 43 of cricut cartridge "My World" using the tile and frame features.

I hope you enjoyed these layouts. I'll post some more in a few days. If you would like to see more heritage layouts, check out my archives. Please leave a comment  and I would love for you to follow my blog!

Monday, February 14, 2011

Now You Are One

This is the layout I finally finished of my granddaughter's first birthday. (She's now almost 3!)

I created this layout using just A Child's Year. The baby in the highchair is from pg. 28, cut at 5". I made the taller girl on the second page using the fairy and its shadow from pg. 77(shift), cut at 4"" (I cut the wings off)The cut was flipped to face the opposite way. The little girl is from pg. 64(shift) cut at 3". I used only the girl on the left. "Happy Birthday" was from the font on pg. 71. The balloons were made using the monogram(shift) feature cut at 3 1/2". Thanks for looking.

Friday, February 11, 2011

U R Purrfect

This is my newest wobble card made for my granddaughter. I used Create a Critter for most of it.


I started with the cat shadow on pg. 38 of Create a Critter sized at 5". I welded the pillow shape, sized at 1 3/4" to the bottom. I rotated the image 45degrees, duplicated it, flipped it, then welded the two halves together for the card.


This screen shows three base cuts of the cat. Two were cut from tan for the front and back of the card base. The other was cut from black for the base of the cat head.


This layer is layer 1 and will be used for the wobble head. It was cut fron tan.The body is cut off and discarded. I cut the pillow from pink leopard print and the ruffle and nose (layer 2) from bright pink. The pillow was sized at 1 3/4".


I made this layer sized at 1 1/4". "Purrfect " and  "UR" were cut from tan. "Purr" and "UR" were cut from bright pink. The "U" and "R" were not cut from CAC. You can use any font you like for these.
These were layered and off set to show some of the color of the bottom layer.

I added small green wobble eyes to the face. I will add a ribbon bow to the cat. (I forgot to do it for the picture).

The wobble head was created by winding fine craft wire around a paintbrush handle about 10 times. One end was attached to the back of the head with a pop dot, and the other end was attached to the corresponding spot on the base of the card.  TFL!

Saturday, February 5, 2011

Cricut manuals and font organization


I've been busy this week trying to organize my Cricut cartridge manuals and making a record of all the fonts I have. I use my Gypsy all the time, but I still like to use my manuals, and the Gypsy doesn't have a way to see all my font choices in one spot. So this is what I came up with.


I adapted this idea from" Okie" on the cricut message board. For mine I started with a Rubbermaid photo storage box. It's just wide enough for the manuals. I used file folders for my dividers. I got two from each folder. First I cut each side of the folder 7 7/8" wide by 8" long (not counting the tab). I used my cutter with an embossing blade and embossed across the width of each one at 3 7/8" and 4 1/8" and folded it to make a flat bottom for the manual to sit on. Use folders with tabs on the ends or you will need to trim a little extra off folders with center tabs. This system holds 40 manuals nicely.


This is the system I came up with to show what fonts I have . I started with a D-ring binder made to use with standard size index cards. (It came with the dividers) I just went through my cartridges and cut out examples of any and all fonts that are on my cartridges. I hand labelled them according to the feature they were under on each cartridge.They are now all stored alphabetically, and I can easily add to it when I get new fonts. It's not fancy, but I'm happy with it.

Tuesday, February 1, 2011

Wobble/Rocker card


I made this card using the squirrel from Create a Critter. I started with the shadow feature of the squirrel at 5". I welded an oval from George and Basic Shapes to the bottom . I then copied this shape and flipped it. I then welded the two halves together to make the card. Two ovals slightly smaller were added to this screen for grass on the card.
Below is my gypsy screen for some of the card parts. I cut three of layer 1 from a rust/brown .Hide the face features on one for the back. (I flipped one for the back). This layer also has two of the base(one flipped) which were cut from dark brown.


This is the 3rd layer with another base for behind the wobble head, two tail stripes from layer 2(one flipped)cut from light brown, and the face from layer 3, cut from cream.

Assemble the card making a back to match the front,  without the face. I only made a face on the part that wobbles. I trimmed the wobble head so it only had the head. I made the wobble mechanism by winding light craft wire about 10 times around a paintbrush handle. I used glue dots to attach one end of the mechanism to the back of the head and the other end to the corresponding area of the card front. I added acorn accents to help keep the card from tipping over from either side. 


I added "Nuts about You", cut at 4 3/4" from rust/brown. and light brown , inside for the sentiment.
Thanks for looking!