Wednesday, March 2, 2011

Heritage-M

This layout is of my father-in-law and his parents from about 1921-1922. The close up shows a charm with my FIL's picture. The second page contains tags with basic information and memories my FIL had of his parents.  Background papers for this layout are from K & CO. and Penny Black. Accents are from K & CO. and various other sources.


This next layout is about my father-in-law's school days and some childhood memories. I had no pictures of my FIL for this layout, so I copied pictures of the school he attended and the neighborhood store/theatre from a centennial book to include. The papers used in this layout are from Paper Pizazz. Journalling was printed on transparency film and tucked into place.

This next layout is a family photo taken in front of the family car. For the left hand page I copied the photo (and reversed it) onto transparency film, then mounted it onto cursive printed paper. The next page contains the same photo printed in sepia.tones. For the bottom, I enlarged the photo, and cut each person out separately, then mounted each in a slide frame. These were antiqued with Distress Ink.  The tags were made from the Paper Pizazz Heritage Kit. The background was pieced together from K & CO. scraps. The antique car accent was made from the car on page 54 of the Heritage Cricut cartridge.


This layout shows my father-in-law when he was in his teens. The background was made from Vintage Basics, from Colorbok. The tag was made from pieces from K & CO..The second page contains memories of my FIL's youth.


This last layout is of my in-laws wedding day. The background paper is from K & CO.  The center is a 10" x 8" piece of printed paper. I scanned a sheet of music and printed it onto the printed paper. The picture used is 3 3/4" x 5 1/2" accented with corners by K & CO. I cut 1 1/4" scallopped accents for above and below the picture. The definitions of  "LOVE" and  "FOREVER" were added above and below for accents.  1" ivory pearled ribbon was added all across the top and bottom of the page, centered at 1".  3/4" ivory pearled ribbon was added down the left and right sides of the center area.

The second page is made in a similar fashion, but features the marriage license and four 2 1/2" x 3 1/2" photos. Thanks for looking. I'd love for you to follow my blog and leave a comment.

Heritage-M

Here are some more heritage layouts from my husband's family. This first layout is of my husband's grandfather's second marriage.  The second page will contain a Family Group Sheet (K & CO.) where I will record all of the family information. The paper used in this layout is mostly from K & Co. A 10" x 10" vellum print mat was placed behind the 4 3/4" x8" photo, matted to 6 1/2" x 9". Antique buttons were added across the top, and a 2 1/2" wide gold ribbon was added underneath. "Family" was from K & Co..


Sunday, February 27, 2011

Heritage layouts-M

Hi! I thought I would post a few more heritage layouts. These are from my husband's side of the family. This first picture is the opening page of the album.

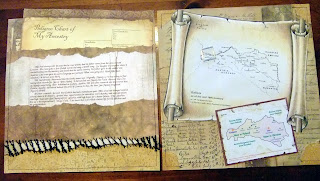
The second layout is similar to the one I did for my mother's heritage album. The left page contains a brief history of the family's origins, and tucked in the pocket will be an ancestry chart. The second page shows maps of the area of their origin.( Karen Foster makes nice ancestry charts in 12 x 12 form.)


The next layout is of my husband's grandfather's immigration to America. I only had one picture of him , so I looked up the ship he sailed on on the internet and also pictures of steerage passengers from that time and included these on the layouts.


This great trunk paper is called "Grandma's Trunk" and is from Karen Foster. (She has great heritage papers and accents.) I made a pocket with the trunk paper by sewing along the edges. Then I tucked in a picture, a watch and ticket stickers (K& Co, and Karen Foster), journaling, stamped knife image (Stampin Up), old chain and antique buttons. The round letters are old ones from Joann's.

This layout shows my husband's grandfather's first wedding on the first page and a family group page on the second page. (The family group paper is also from Karen Foster.)


John Mastie worked in the Pennsylvania coal mines and later in the iron mines here in the U.P. of Michigan. I had no pictures of him in the mines so I copied pictures from the internet showing coal miners from that time for page one. For the second page I copied pictures of the iron mine he worked in from a centenial book of the area. I included mining accents from pg. 43 of cricut cartridge "My World" using the tile and frame features.

I hope you enjoyed these layouts. I'll post some more in a few days. If you would like to see more heritage layouts, check out my archives. Please leave a comment  and I would love for you to follow my blog!

Monday, February 14, 2011

Now You Are One

This is the layout I finally finished of my granddaughter's first birthday. (She's now almost 3!)

I created this layout using just A Child's Year. The baby in the highchair is from pg. 28, cut at 5". I made the taller girl on the second page using the fairy and its shadow from pg. 77(shift), cut at 4"" (I cut the wings off)The cut was flipped to face the opposite way. The little girl is from pg. 64(shift) cut at 3". I used only the girl on the left. "Happy Birthday" was from the font on pg. 71. The balloons were made using the monogram(shift) feature cut at 3 1/2". Thanks for looking.

Friday, February 11, 2011

U R Purrfect

This is my newest wobble card made for my granddaughter. I used Create a Critter for most of it.


I started with the cat shadow on pg. 38 of Create a Critter sized at 5". I welded the pillow shape, sized at 1 3/4" to the bottom. I rotated the image 45degrees, duplicated it, flipped it, then welded the two halves together for the card.


This screen shows three base cuts of the cat. Two were cut from tan for the front and back of the card base. The other was cut from black for the base of the cat head.


This layer is layer 1 and will be used for the wobble head. It was cut fron tan.The body is cut off and discarded. I cut the pillow from pink leopard print and the ruffle and nose (layer 2) from bright pink. The pillow was sized at 1 3/4".


I made this layer sized at 1 1/4". "Purrfect " and  "UR" were cut from tan. "Purr" and "UR" were cut from bright pink. The "U" and "R" were not cut from CAC. You can use any font you like for these.
These were layered and off set to show some of the color of the bottom layer.

I added small green wobble eyes to the face. I will add a ribbon bow to the cat. (I forgot to do it for the picture).

The wobble head was created by winding fine craft wire around a paintbrush handle about 10 times. One end was attached to the back of the head with a pop dot, and the other end was attached to the corresponding spot on the base of the card.  TFL!

Saturday, February 5, 2011

Cricut manuals and font organization


I've been busy this week trying to organize my Cricut cartridge manuals and making a record of all the fonts I have. I use my Gypsy all the time, but I still like to use my manuals, and the Gypsy doesn't have a way to see all my font choices in one spot. So this is what I came up with.


I adapted this idea from" Okie" on the cricut message board. For mine I started with a Rubbermaid photo storage box. It's just wide enough for the manuals. I used file folders for my dividers. I got two from each folder. First I cut each side of the folder 7 7/8" wide by 8" long (not counting the tab). I used my cutter with an embossing blade and embossed across the width of each one at 3 7/8" and 4 1/8" and folded it to make a flat bottom for the manual to sit on. Use folders with tabs on the ends or you will need to trim a little extra off folders with center tabs. This system holds 40 manuals nicely.


This is the system I came up with to show what fonts I have . I started with a D-ring binder made to use with standard size index cards. (It came with the dividers) I just went through my cartridges and cut out examples of any and all fonts that are on my cartridges. I hand labelled them according to the feature they were under on each cartridge.They are now all stored alphabetically, and I can easily add to it when I get new fonts. It's not fancy, but I'm happy with it.

Tuesday, February 1, 2011

Wobble/Rocker card


I made this card using the squirrel from Create a Critter. I started with the shadow feature of the squirrel at 5". I welded an oval from George and Basic Shapes to the bottom . I then copied this shape and flipped it. I then welded the two halves together to make the card. Two ovals slightly smaller were added to this screen for grass on the card.
Below is my gypsy screen for some of the card parts. I cut three of layer 1 from a rust/brown .Hide the face features on one for the back. (I flipped one for the back). This layer also has two of the base(one flipped) which were cut from dark brown.


This is the 3rd layer with another base for behind the wobble head, two tail stripes from layer 2(one flipped)cut from light brown, and the face from layer 3, cut from cream.

Assemble the card making a back to match the front,  without the face. I only made a face on the part that wobbles. I trimmed the wobble head so it only had the head. I made the wobble mechanism by winding light craft wire about 10 times around a paintbrush handle. I used glue dots to attach one end of the mechanism to the back of the head and the other end to the corresponding area of the card front. I added acorn accents to help keep the card from tipping over from either side. 


I added "Nuts about You", cut at 4 3/4" from rust/brown. and light brown , inside for the sentiment.
Thanks for looking!

Saturday, January 29, 2011

Fabulous Winter


Hi! This is a layout of my granddaughters' first experience ice skating.

Background: I used a blue dotted cardstock for the foundation.(This was from an old Walmart winter paper pack) I then added a 4 inch silver pearlescent strip(Colorbok) to the bottom for the ice. I then cut a 5 1/2 inch strip of white pearescent paper which I trimmed at a curved angle to 4inches to form the upper side of the ice rink. Two 3 inch triangles were trimmed slightly on a curve for each bottom outside corner for the bottom of the rink. I then cut two 5 x 2 inch strips from white glitter paper (Colorbok) and hand cut a scallop on the bottom edge. These were attached to the top outside edges of the white strip. (pictures will cover the center area.)

Characters: The girls and the snowman were cut at varying sizes ( 3 1/2 - 4 1/4 inches) using Jolly Holidays.
The giraffe was cut from Birthday Bash at 4 inches. I cut extra skates from Jolly Holidays to attach from behind after I cut the rollers off his skates. Before I attached the characters, I made a curved path using dots made with a white gel pen to show where they skated. I added a clear rhinestone to each end of the path.

Houses and trees:  These were all cut from Jolly Holidays at 4 inches.

Title:  "Fabulous" and "Winter" are from Gypsy Wanderings. I welded the ice skates from Celebrate with Flourish to the word "Winter". They were all sized at 1 3/4 inches and cut from white glitter paper. I cut a coordinating shadow from silver pearescent paper. I also cut some 1/2 inch snowflakes using Don Juan and Doodlecharms and added clear rhinestones to the centers.

I hope my directions aren't too confusing. Please leave a message if you have questions. Thanks for looking!

Friday, January 14, 2011

Believe

I have decided to try to use up some of my huge stash of paper and other supplies. This layout was made using a kit that I think I found at the dollar store! I cut the 4 inch elf border with a deco scissor and mounted it on the left with a 1/2 inch white and silver ribbon peeking from underneath. All the characters were cut from Jolly Holidays. The elf was cut at 4 inches.(I cut extra lengthes of lights by hiding the other cuts from the black layer and then duplicating it 4 times.) The squirrel and racoon were about 2 inches, and the bird was done at 1 1/2 inches. "Believe" was cut from Gypsy Wanderings. The height is 3 inches and the length was stretched with the gypsy to 6 inches. I did the shadow to match.  I think I like the way this turned out. TFL!


Wednesday, January 12, 2011

Heritage-K

Hi! I haven't posted any heritage layouts lately, so here are the next few from my mother's heritage album. Hope you like them.


This is a layout of my maternal grandmother and what little I know of her background. On the second page is a picture of her with me, my sister and my brother in about 1955. The paper I used is from K & CO.

My mother had a very tough childhood during the Depression. This is a layout showing the significant places from her childhood. Each picture flips up to show journaling about each location. The title says:"Mom's Childhood Didn't Have Any Color, Only BLACK & GRAY". The lettering is from K & CO. and the hinges and tabs were made using Fabulous Finds.

This layout shows my mom when she was in high school playing with her two little sisters. It's a pretty basic layout. I believe the font is Jasmine.

This is a very simple layout about my mom's first job. I interviewed her and that discussion was printed on transparency paper and mounted over printed paper on page 2. The papers were from a heritage kit from Paper Pizazz.


This is my mom's high school graduation layout. I scanned and reduced the size of her diploma and yearbook. I also scanned the page from her yearbook that Mom was on ,and tucked that section  so that it peeked out from  behind the yearbook. Thanks for looking. Please leave your comments.

Kairi's 1rst Bike

Sorry I haven't posted in awhile- no motivation I guess.
This is a layout of my 2 1/2 year old grand-daughter after she got her first bike for Christmas. She was so excited! She sat on it all day and wouldn't eat Christmas dinner until we parked her bike behind her chair at the table. She cried so hard when she had to leave it at our house because it wouldn't fit in the car.

For this layout I used Hello Kitty for the characters and tree, cut at 3/13 to 4 inches. The bike was cut from Paper Dolls for Everyday, cut at 4 inches. The flowers and snowflakes are from K & Co. Thanks for looking!